General Cleaning: The Heart of a Healthy Home. The most comprehensive guide.
 Lawler Mike2026-05-21
Get a clearer sense of what a genuinely clean home feels like. I want to walk through the whole house with you, point out a few easy-to-miss cleaning missteps that can quietly build up over time, and explain how Magical Cleaning’s professional general cleaning helps households across Kilkenny, Portlaoise, Waterford, Carlow, and Tipperary get back some comfort, a healthier space, and more breathing room in their week. Today, the plan is to look more closely at what the cleaning process actually involves, call out the most common mistakes, and run through practical ways to deal with everyday dirt and grime.
More Than a Tidy Space. How often should you do a General Cleaning?
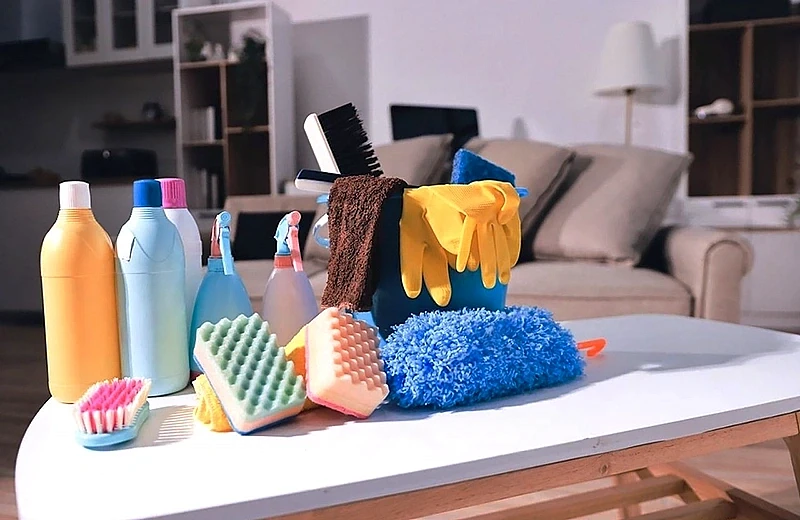
When we talk about cleaning, especially general cleaning, many people picture a quick vacuum, a wipe of the kitchen counters, and a tidying of the living room. Day-to-day habits matter, but real general cleaning tends to run deeper than that. For me, it’s about keeping a home consistently healthy, so you can actually switch off, relax, and breathe a little easier. For over five years, Magical Cleaning has been reshaping what “clean” looks like for families across southeast Ireland. From the older streets of Kilkenny to the busier pace of Waterford, and in communities like Portlaoise, Carlow, and Tipperary, we’ve seen up close how much difference a professional clean can make.
This article is meant to be a practical, in-depth guide to what “truly clean” looks like in a real home. We’ll move room by room and call out the areas people often overlook, then look at a few common, well-meaning habits that can quietly work against your efforts. From there, I’ll lay out the systematic, approachable process our teams rely on to deliver a consistently spotless, healthier outcome. It’s not only about cleaning; it’s also about making day-to-day life at home feel better.
The Anatomy of Your Home – A Room-by-Room Reality Check
If you want to get cleaning right, it helps to start by paying attention to what makes each room different. Every space in a home is used in its own way, and that usually means it collects its own mix of dust, dirt, and buildup. When you do a one-size-fits-all clean and handle every room the same, you’ll typically miss things and the result won’t feel fully finished.
The Kitchen: The Heart of the Home and a Magnet for Grime
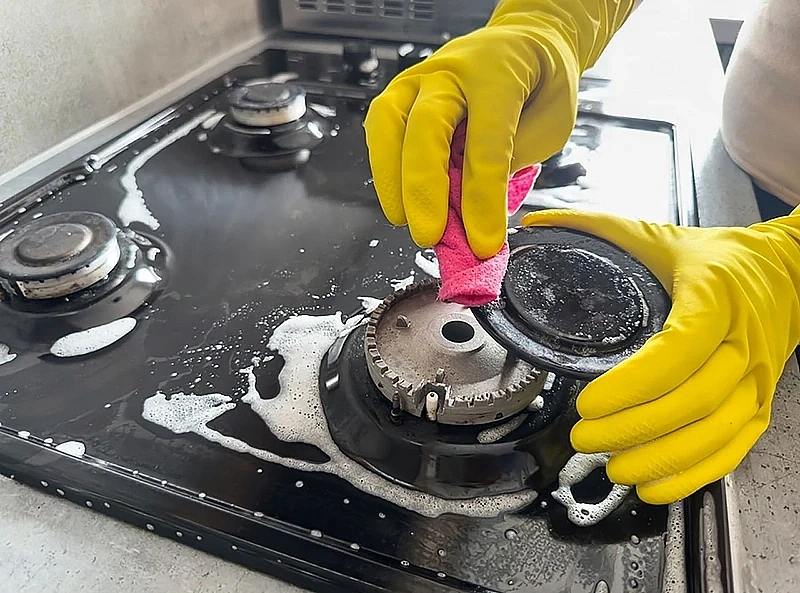
The kitchen is, in many homes, the most demanding room to keep truly clean, and it also happens to be the one where the stakes feel highest. It’s where food gets handled every day, so hygiene isn’t just a nice extra - it’s the baseline expectation. Even if the countertops look fine after a quick wipe, the reality of daily cooking is that you’re dealing with an ongoing, mostly invisible mix of grease, tiny food particles, moisture, and bacteria. If you’ve ever wondered why a kitchen can still feel “off” even after you’ve tidied it, it often comes down to the places and materials that quietly hold onto grime.
Cooking grease is a good example of how mess travels. It doesn’t stay politely near the hob. As you fry, sauté, or roast, fine droplets can become airborne and spread farther than you’d think, settling onto anything nearby that’s horizontal or slightly textured. The splashback is the obvious target, but the more telling build-up tends to happen out of your normal line of sight: the tops of wall cabinets, the edges of shelves, light fixtures, and sometimes even the ceiling. Over time, that thin, sticky film acts like a magnet for dust, so what starts as grease ends up becoming a dull, grimy layer that’s harder to remove than plain dust would be. It’s the kind of residue that can make a “clean” kitchen feel slightly tacky, especially around handles, switches, and the areas you touch most.
The sink is another spot where appearances can be misleading. Because it’s constantly exposed to soap and water, it’s easy to assume it’s self-cleaning. In practice, it can be one of the more bacteria-friendly zones in the room, largely because it combines everything bacteria like: moisture, warmth, and food residue. Bits of protein, starch, and fats can linger in the basin, around the drain, or in the rubber seals and strainers, even if you rinse regularly. That damp environment, especially when sponges or cloths are left nearby, can support bacterial growth to a surprising degree sometimes discussed as being comparable to, or even worse than, what you’d find on a toilet seat. It’s not meant to be sensational; it’s simply a reminder that “washed frequently” isn’t the same thing as “sanitised,” and the sink is a place where those two ideas get confused.
Inside the refrigerator, the problem shifts from grease to time. Small spills, sticky jars, and that one forgotten container in the back can turn into a slow-moving source of odours and mould. Crumbs in the vegetable drawer and residue in door shelves are easy to miss because they don’t look dramatic, but they’re enough to create a damp, nutrient-rich corner where mould can take hold. And once a smell settles into plastic drawers or seals, it can linger long after the original culprit is gone, which is why fridges sometimes need a deeper reset rather than another quick reorganise.
Then there are the areas behind and under big appliances the places most people don’t see unless something rolls out of reach. The fridge, oven, and even dishwashers can create pockets that collect dust, stray food items, and grease-laden fluff over time. It’s a quiet accumulation, but it matters: dust build-up can affect airflow, dropped food can attract pests, and hidden grime can contribute to persistent smells that you can’t quite locate. If these zones are ignored for long enough, they become less a “mess” and more a little ecosystem - one that’s entirely avoidable, but only if it’s acknowledged in the first place.
The Bathroom: A Sanctuary That Requires Constant Vigilance
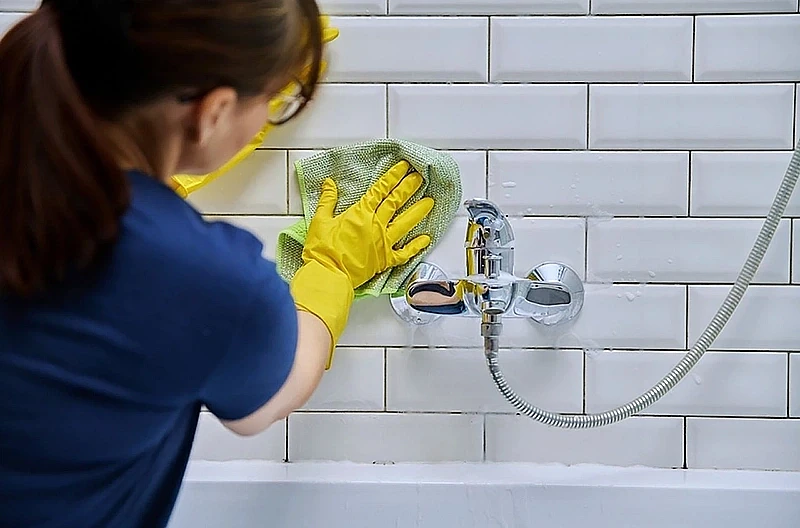
Bathrooms are meant for personal hygiene, but the mix of warmth, steam, and limited airflow makes them a natural hotspot for mould, mildew, and bacteria. It’s easy to assume a quick DIY routine covers the essentials because the obvious targets are right in front of you the toilet bowl, the sink, and the shower tray. That kind of cleaning does help, but it also tends to stay on the surface, both literally and figuratively, and it can miss the places where problems quietly build up over time.
Once you look at a bathroom through a more professional lens, the story gets more detailed. Soap scum isn’t just “a bit of residue”; it’s a sticky blend of soap, minerals from hard water, and body oils that bonds to shower walls, glass doors, and taps. It doesn’t just look dull or feel grimy it creates a film that holds moisture and gives mildew a stable place to settle in. This is why a shower can look acceptable at a glance yet still develop that persistent musty smell, especially in corners and along edges where water regularly sits.
The showerhead is another area that’s easy to overlook because it’s above eye level and usually still works until it doesn’t. Over time, limescale can build up in and around the nozzles, and that buildup can reduce water pressure or make the spray uneven. Hygiene is part of the equation too: a damp showerhead can harbour bacteria, particularly in households where the shower isn’t used daily or where the bathroom stays humid for long stretches. It’s the kind of issue that doesn’t announce itself loudly, but it can affect both performance and cleanliness in ways people don’t immediately connect to the fixture itself.
Then there are the grout lines. Grout is porous, which sounds technical but translates to a simple reality: it absorbs what it touches. Moisture, dirt, and soap residue gradually work their way in, and grout that started out light can slowly shift toward a darker, unhealthy-looking tone. In a tiled shower, that discoloration is often read as “age,” but it’s frequently a sign of ongoing moisture retention and embedded grime. Once that happens, wiping the tile surface isn’t enough, because the problem isn’t sitting on top anymore - it’s settled into the material.
Toilets are another classic example of where routine cleaning can stop too soon. The bowl gets attention because it’s the obvious part, but the exterior often doesn’t receive the same care, especially the base and the awkward space behind the bowl. Dust, hair, and splashes can collect there quietly, and because it’s not a place people look at closely, it becomes an easy blind spot. Over time, this buildup can affect odour and overall hygiene, even if the toilet technically “looks clean” from the front.
Even the exhaust fan, which most people rely on without thinking about it, can become part of the problem if it’s neglected. It’s supposed to pull moisture out of the room, yet dust can clog the cover and the fan blades, reducing airflow. When ventilation drops, humidity stays higher for longer, and that lingering dampness gives mould a better chance to take hold on ceilings, in corners, and on surfaces that don’t dry quickly. In other words, the very tool designed to keep the bathroom drier can lose effectiveness without anyone noticing until the signs start showing up.
The Living Room: The Shared Space with Shared Dust
The living room is usually where day-to-day life actually unfolds. It’s the backdrop for family movie nights, kids spreading toys across the floor, guests dropping by, and the quieter evenings when you finally sit down and breathe. Because it gets used so much, it also ends up being one of the places where dust, allergens, and plain old wear build up faster than most people expect.
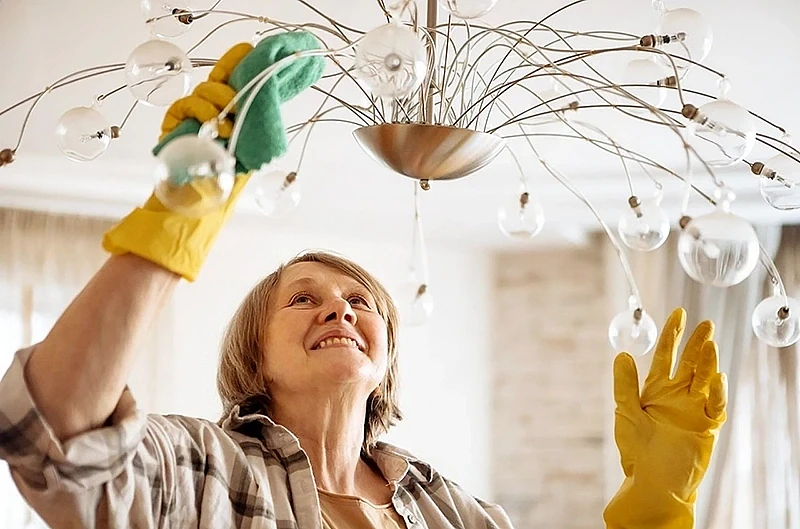
One thing I keep noticing is that the most neglected part of a living room isn’t the floor you can see at a glance. It’s everything above eye level, and all the surfaces you rarely think to check. Dust collects on picture frames, along the top edge of shelving, and up on curtain rods where it can sit for weeks. Light fixtures quietly gather a film of debris, and ceiling fan blades are a classic problem once the fan is switched on, whatever has been resting there doesn’t stay put. It gets pushed back into the air and spread around the room, which is a little like shaking out a dusty rug indoors.
Then there’s the furniture, especially anything upholstered. Sofas and armchairs don’t just “get a bit dusty”; they behave like oversized filters. Over time they trap skin cells, pet dander, dust mites, and everyday smells deep in the fabric and padding where you can’t see it. If you’re not deep vacuuming regularly getting into seams, under cushions, and along the edges you’re effectively sitting on a concentrated pocket of allergens. It’s not a dramatic point, just a practical one: soft furniture holds onto what the room produces.
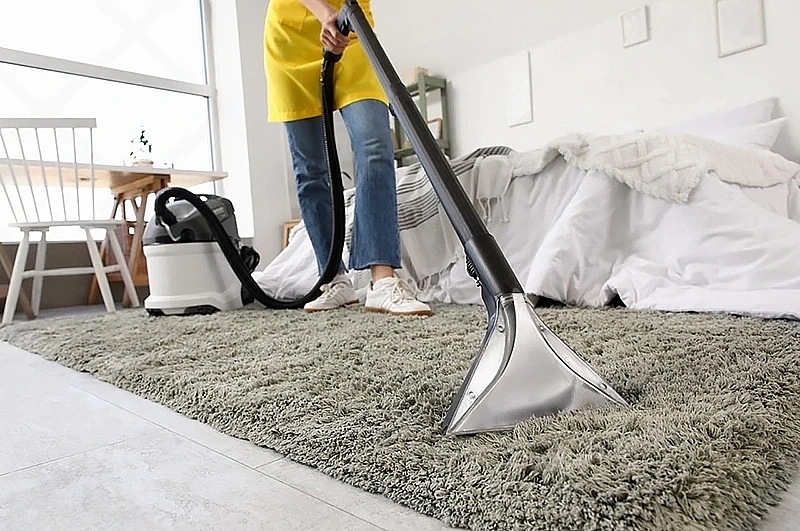
Carpets have a similar issue, and in some homes they’re even more demanding. They can hold a surprising amount of dirt and fine particles, including grit that works its way down below the surface. A quick pass with a vacuum helps, but it doesn’t always pull out what’s embedded deeper, especially in high-traffic areas or where people tend to sit and snack. That’s why carpets can look “fine” while still carrying a lot of what you’d rather not have circulating.
And of course, the areas you don’t see become their own little ecosystems. Under sofas, behind media consoles, and beneath bulky furniture, dust bunnies form and keep growing, often tangled with pet hair and whatever else drifts down there. It’s easy to forget those spaces because they’re out of sight, but they keep feeding dust back into the room whenever something shifts or someone walks heavily nearby.
The other piece people tend to underestimate is the set of high-touch items everyone uses without thinking. Remote controls, light switches, game controllers, and similar surfaces get passed around all day, picked up after meals, handled by kids, shared with guests, and set down in random places. They can end up being some of the most contaminated objects in the home, not because anyone is careless, but simply because the contact is constant and cleaning them often isn’t part of anyone’s routine.
The Bedroom: A Personal Haven That Must Be a Healthy One
We spend about a third of our lives in the bedroom, so it’s hard to separate how clean that space is from how we feel day to day. The bed is really where most of the issue concentrates. Over time, a mattress can gain a surprising amount of weight as dust mites (and what they leave behind), dead skin, and sweat build up inside it. Left alone, that mix turns the place you’re meant to recover into something that can aggravate allergies or asthma. Even if you’re good about washing sheets every week, pillows, duvets, and the mattress itself often don’t get the same attention. And the dust doesn’t stop there: it settles behind the headboard, clings to bedside surfaces, hides in drawers, and gathers on wardrobe floors in a layer of fibres and fine debris. If the room has air registers or vents and they’re not cleaned, they can keep pushing around stale, dusty air, including the same particles you’re trying to get rid of.
The Entryway and Hallways: The First Impression and Unseen Collector The entryway is your home’s first buffer between indoors and everything you’ve walked through outside, and it takes the hit for it. Shoes bring in mud, dirt, moisture, and small bits of grit, and those get pressed into the floor almost immediately. With that kind of traffic, debris builds up quickly; without regular vacuuming and mopping, it can start to scratch and wear down hardwood, tile, or laminate. In hallways, skirting boards become a natural shelf for drifting dust, and it keeps coming back. Door handles and the paint around them pick up oils and grime from hands, which is why they quietly turn into higher-risk spots for bacteria. Hallways are the routes you take all day, and when they’re neglected, the whole house tends to feel that way too.
Our cleaner, Sean, has highlighted some common mistakes people make when cleaning their homes themselves
My name is Sean O’Reilly, and I’m the Chief Technologist at Magical Cleaning. I’ve been with the company for a little over three years now, spending my time in real homes from Kilkenny to Carlow, seeing how people actually clean when no one’s watching. What stands out is that most problems don’t come from a lack of effort; they come from a handful of small habits that quietly undo the work. If you’ve ever finished a clean and wondered why things still feel a bit grimy a day later, it’s usually something simple. So here are a few practical, friendly tips I keep coming back to aimed at making your cleaning more effective without turning it into a bigger job.
First, retire the “one-cloth does everything” approach. Using the same rag for the bathroom and then the kitchen doesn’t really clean so much as redistribute what you’ve just lifted, especially when you move from higher-risk areas to food-prep surfaces. It’s easy to underestimate how quickly that cross-contamination happens, because the cloth looks fine to the eye. In our work we colour-code cloths blue for glass, yellow for kitchen, red for toilets and the point isn’t the colours themselves, it’s the discipline they create. Once you separate tasks like that, the whole routine gets cleaner and faster, because you’re not constantly re-cleaning what you’ve accidentally re-soiled.
Next, let your products do their job before you rush in with a wipe. Spraying and immediately wiping is one of the most common patterns I see, and it makes sense people want to move on. The catch is that many disinfectants and antibacterial sprays need contact time, often five to ten minutes, to actually reduce bacteria properly. If you wipe it straight away, you’ve basically used an expensive perfume. A better rhythm is: spray bathroom surfaces, step away for a few minutes, make a cup of tea, empty a bin, or tidy the floor, then come back and wipe. It’s a small change in timing, but it tends to make the results feel noticeably more “finished,” especially around sinks, taps, and toilet exteriors where residue and splash-back build up.
Don’t forget to look up. Most people clean what they can see at eye level, but a surprising amount of household dust settles on top of cabinets, on light fittings, along picture frames, and on ceiling fans places you rarely look at unless the light hits them a certain way. If you start by polishing counters and then disturb those higher surfaces, the dust simply falls back down and you end up wondering why the room looks dull again. I usually begin with an extendable duster, work from the highest points down, and only then move to the counters and floors. It’s a bit like painting a wall: if you start at the bottom, you’ll spend the rest of the time fixing what dripped down.
Your vacuum is only as effective as the filter and airflow allow. A full bag, an overstuffed canister, or a clogged filter doesn’t just reduce suction; it can also push fine dust back into the room, which is the opposite of what you want especially if anyone in the home is sensitive to dust. Emptying the vacuum regularly matters more than people think, and filters need attention too. If you have a HEPA filter that’s washable, a monthly rinse can help, as long as you give it enough time to dry fully before putting it back in. Damp filters can create their own problems, and a vacuum that smells “off” is often a maintenance issue rather than a mystery.
Finally, with cleaning product, it’s usually better to use less than you feel you should. Over-spraying seems like it would clean better, but in practice it often leaves a film slightly sticky, slightly streaky that attracts dirt and fingerprints faster, especially on glossy kitchen fronts, stainless steel, and bathroom tiles. For everyday cleaning, a light mist on your cloth is often enough, and it gives you more control than flooding the surface. You’ll also find you spend less time buffing and re-wiping, because there’s less residue to chase. The surfaces tend to stay cleaner for longer, not because you used stronger chemicals, but because you didn’t leave behind anything for grime to grab onto.
The Pitfalls of Self-Cleaning – Common Mistakes and Where Good Intentions Fail
Cleaning seems straightforward on the surface, but without a professional’s insight, even the most diligent efforts can be inefficient, ineffective, or even damaging. We at Magical Cleaning see these well-intentioned mistakes repeatedly. Understanding them is the first step towards a truly cleaner home.
1. The Chaotic Approach: Cleaning Without a Plan The most fundamental error is diving in without a systematic plan. Many people start with the chore that bothers them most, bouncing from room to room, tackling a mirror here, a toilet there. This chaotic, unstructured approach eats up precious time and inevitably leads to rework. Without a logical order, you are often cleaning areas you’ve already finished. A professional’s golden rule is always to clean from top to bottom, working from the dry tasks to the wet ones. If you dust your coffee table after vacuuming the floor, you’re simply creating a new layer of dust on your freshly cleaned carpet.
2. The "One-Cloth Wonder": A Cross-Contamination Crisis Using a single cloth, sponge, or mop head to clean the entire house is one of the most dangerous mistakes. This is how you transport bacteria from the toilet to the bathroom sink, and then spread them to the kitchen countertops. You are not cleaning; you are simply moving a bio-hazard around. A colour-coded microfiber system is the industry standard a specific colour for the kitchen, another for the bathroom, and another for general dusting to eliminate the risk of cross-contamination entirely.
3. "More is Better": The Chemical Assault When faced with a tough stain or greasy surface, the instinct is to pour on more product. This is counterproductive. Over-application of detergents leaves behind a sticky, chemical residue that acts as a dirt magnet, meaning your surfaces will actually get dirty faster after you’ve cleaned them. This residue can also dull the shine of floors and worktops and is particularly harmful to delicate surfaces like natural stone, where the wrong or excessive chemicals can cause permanent etching and damage.
4. The Rushed Wipe: Impatience with Products All effective cleaning products, especially disinfectants, require “dwell time” to work. This is the period they must remain visibly wet on a surface to break down grease, dissolve soap scum, and kill bacteria and viruses. A common mistake is to spray and wipe immediately. The product has had no time to do its job, so you’re essentially just wiping away the chemical rather than the dirt. For a bathroom disinfectant, this wait time can be anywhere from 5 to 10 minutes.
5. The Tool Trap: Cleaning with Dirty Tools Vacuuming with a bag or filter that is bursting at the seams is like cleaning with a hair dryer covered in dust it simply blows particles back into the room and reduces suction power significantly. A mop used with dirty water is equally pointless, as you're just spreading a thin, dirty film across your floors. Sponges are perhaps the worst offenders; their moist, porous nature makes them a perfect habitat for bacterial colonies. Tools must be cleaned and maintained after each use for them to serve their purpose.
6. Ignoring the Vertical World: A Failure of Vision Most people clean from their eye level down. The surfaces above our heads the tops of kitchen cabinets, tall bookshelves, curtain pelmets, and ceiling fans - are often completely ignored for months or even years. This accumulated layer of sticky, oily dust then becomes a reservoir that re-contaminates the rest of the room. A professional eye is trained to scan a room from ceiling to floor, creating a mental checklist that includes every surface plane.
7. The Wrong Tool for the Job Using a scouring pad on a delicate stainless steel fridge can leave a network of irreversible scratches. Using a generic floor cleaner on a waxed hardwood floor can strip the finish and dull it. Pouring acidic vinegar down a marble countertop will etch the stone. This happens not out of carelessness, but from a lack of specific material knowledge. Professionals are trained to identify surfaces and select the correct pH-neutral or material-specific cleaning agents to restore and protect, not damage.
We asked Sean to focus on the main issues involved in doing the cleaning yourself
It’s me again, Sean O’Reilly. I keep thinking back to a call I got from a landlord couple in Kilkenny last spring, because it captures a situation a lot of property owners run into sooner or later. Their city-centre apartment had been left in rough shape by the previous tenants, and they already had a viewing lined up for the day after next. There wasn’t room for delays or trial-and-error, and they weren’t looking for a “good enough” tidy-up. They needed the place to look like someone could move in without hesitation.
The kitchen was the kind of sticky you only really notice when you put your hand on a surface. The hob and extractor were coated in baked-on grease that had clearly built up over time, not over one bad cooking night. In the bathroom, the glass screen and chrome had that cloudy, crusted limescale you can’t just wipe away, and the grout was stained with mould that made the whole room feel tired, even if the fixtures themselves were fine. The carpets were another problem: they’d turned a dull grey from ground-in dirt, which is exactly what happens when foot traffic and neglect combine. On paper it sounds like “just cleaning,” but in practice it’s a set of different jobs with different risks, especially when you’re up against a deadline and you can’t afford to damage surfaces.
When I walked in, I knew a DIY scrub would be the wrong tool for the job. Not because people can’t clean, but because speed and safety start to fight each other when you’re dealing with stubborn grime. Push too hard and you scratch stainless steel, haze glass, or rough up a coating that was meant to protect a surface in the first place. And if you pick the wrong chemical, you can trade “dirty” for “damaged” in a hurry. In places like rentals, that can be a costly mistake: a scratched hob, etched chrome, or bleached grout is the kind of thing future tenants notice, even if they can’t name the cause.
So instead of relying on elbow grease, I leaned on what I’ve learned from doing this professionally and on the kit we bring for exactly these turnarounds. I let our citrus degreaser sit on the hob and extractor long enough to break down the polymerised grease, because the dwell time is doing the hard work there, not the scrubbing. It’s a simple idea, but a lot of people rush it and then end up scraping at surfaces that don’t respond well to force. A low-odour, commercial oven cleaner lifted the carbon from the oven interior while we worked elsewhere, which matters when the goal is to move quickly without turning the whole place into a fumey construction site. In a small apartment, smell isn’t just a comfort issue; it changes how “clean” the space feels during a viewing.
In the bathroom, we approached it with the same mindset: precise chemistry, controlled contact time, and minimal abrasion. A mild acid descaler dissolved the crusty limescale on the glass screen and chrome without etching. That “without etching” part is the difference between a clean shine and a permanently dulled finish, and it’s why I’m cautious about random strong acids or improvised mixes. For the grout, an oxygenated cleaner brightened the lines in one careful pass, which is often more effective than grinding away at it with harsh brushes that can fray grout and make it hold dirt even faster later on. It’s not just about today’s result; it’s about leaving the surfaces in better condition so they stay presentable longer.
The carpets were a final piece, and they’re often the thing that decides whether a room feels fresh or just “technically cleaned.” Vacuuming can only do so much once dirt has worked its way down. We revived them with a hot-water extraction machine that pulled out what felt like years of dust, and the key detail here is controlled extraction so you’re not leaving the place damp. In a rental setting, nobody wants to walk into a viewing and wonder if there’s a lingering smell or moisture problem. Done properly, you get a cleaner look, a more neutral scent, and carpets that are dry by morning rather than spongy for days.
Because I knew exactly which product needed what dwell time, and because we worked the apartment in a sequence that made sense, we finished the entire deep clean in a single long day. The apartment looked, felt, and smelled genuinely clean, not “covered up” with heavy fragrance. There’s a big difference between a space that’s been deodorised and one that’s actually been reset, and prospective renters pick up on that faster than people think. The viewing went ahead as planned, and by the end of the week the owners had a signed lease. That’s the power of professional know-how in a situation like this: taking a stressful, time-sensitive mess and turning it into a result that feels straightforward, even when it didn’t start that way.
The Professional Difference – The Magical Cleaning Process
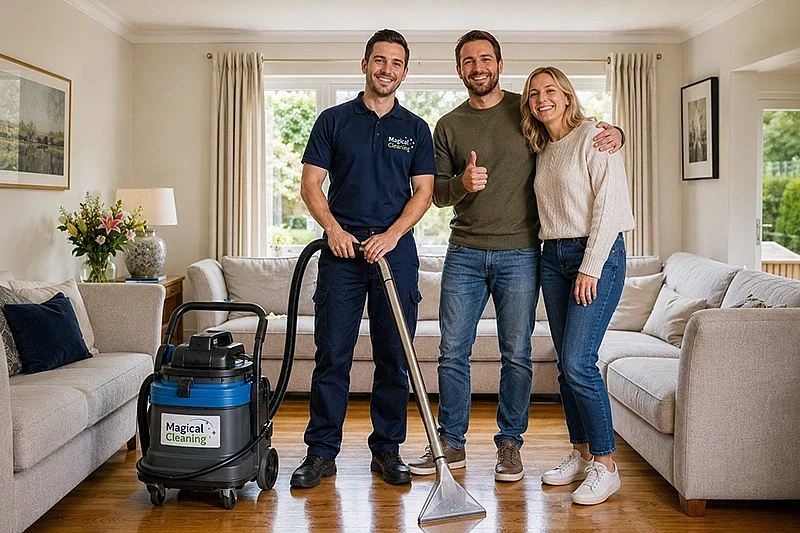
This is where the true transformation happens. When you schedule a general cleaning with Magical Cleaning in Kilkenny, Portlaoise, Waterford, Carlow, or Tipperary, you are not just hiring a pair of hands; you are activating a proven, systematic process designed for one thing: your complete satisfaction and a perfectly healthy home.
Step 1: Pre-Visit Assessment and Customization We understand that no two homes or clients are the same. Our service begins well before a single cloth is lifted. When you reach out, we take the time to understand your unique situation. This involves a detailed conversation about your property its layout, size, and the type of surfaces you have, from the elegant high-gloss kitchens in modern Portlaoise developments to the beautifully traditional stone floors in a Tipperary cottage. This is where we can tailor our general cleaning service to your key priorities, whether it’s focusing on allergy reduction, a sparkling kitchen, or full bathroom sanitation.
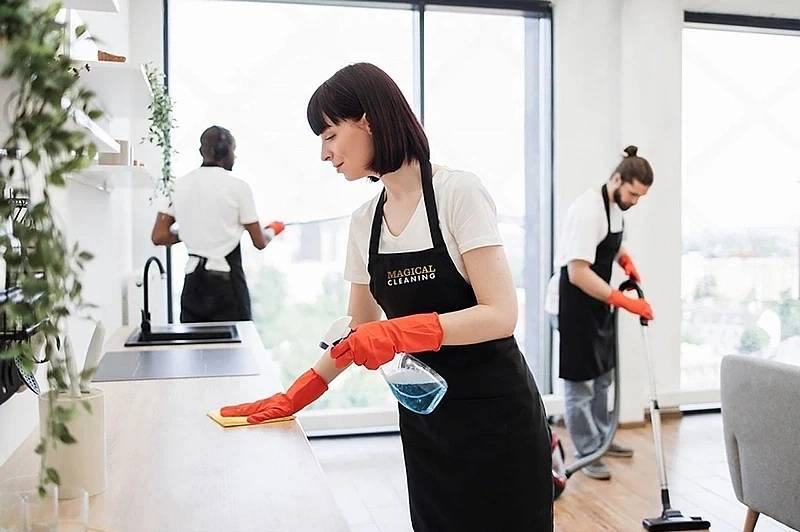
Step 2: The Arrival and Strategic Setup Our friendly, uniformed and fully insured team arrives within a pre-agreed time window. Every team member is a trained professional who treats your home with the utmost respect. We come fully equipped no need for you to provide anything. Our kit isn’t a collection of supermarket sprays; it’s a mobile arsenal of professional-grade technology. This includes HEPA-filtered vacuum systems that capture 99.97% of fine particles, advanced microfiber systems, and European-certified, eco-friendly solutions that are tough on dirt but safe for your family, pets, and surfaces. We protect your furniture and floors by placing down clean drop cloths for our equipment.
Step 3: The Top-to-Bottom, Dry-to-Wet Protocol The physical clean begins with a systematic, military-level precision. We work room by room, and within each room, our process is always the same: high dusting first, then surfaces, then floors. We start by using extendable, electrostatic dusters to capture cobwebs and dust from crown moulding, ceiling corners, and light fixtures. This ensures that all falling dust is captured on the floor, ready to be vacuumed later. We then meticulously work our way down to the middle surfaces. In the living room, this means carefully removing books and objects from shelves, dusting them and the shelf itself, before replacing them with care. We systematically address every single blade of a ceiling fan, every slat of a window blind, and every frame on the wall, as these are the primary collectors of settled dust.
Step 4: The Kitchen Transformation – Deep Degreasing The kitchen receives specialist attention. We move small appliances toasters, coffee makers, knife blocks to clean underneath them, where crumbs and moisture collect. Our focus then turns to degreasing. We use professional citrus-based solvents that break down the sticky, polymerized grease on hob splashbacks, extractor hoods, and cabinet fronts without damaging the lacquer. We detail the sink, scrubbing and polishing it to a new shine, before flushing the drain with a sanitising solution to eliminate odour-causing bacteria. The exterior and interior of the microwave, and all accessible countertop space, are cleaned and disinfected. We finish the kitchen by giving the floor a targeted clean, paying special attention to the corners where debris gathers.
Step 5: The Bathroom Sanitization – A Clinical Approach We don’t just wipe; we sanitize. Our bathroom protocol is a top-to-bottom, disinfection-focused sequence. We begin with a pre-spray on the toilet, shower, and sink, allowing the eco-friendly but powerful solutions to work on dissolving soap scum and limescale. We use dedicated tools for each zone: a separate scrub brush for the toilet, specific microfiber cloths for mirrors and chrome, and non-scratch sponges for tile and basins. We clean the toilet inside and out, including the often-missed base and the area behind the seat hinges. We tackle the shower, using a mild acid-based cleaner on glass doors to remove water spots and soap scum, leaving a streak-free shine. All high-touch metal fixtures, such as tap handles and light switches, are carefully disinfected.
Step 6: The Living and Sleeping Areas – Detail and Upholstery Care In the living and sleeping areas, our general cleaning service shifts to detail work and fabric care. We use powerful, HEPA-filtered vacuums to clean carpets and area rugs, making multiple passes in high-traffic areas to lift deeply embedded dirt. This is where our expertise in upholstery shines, as Magical Cleaning also provides professional dry cleaning for furniture. We will thoroughly vacuum all soft furnishings, including under the cushions and along all crevices of your sofa, removing the hidden build-up of allergens and dust. For surfaces, we use the correct product for every material, ensuring that your wooden furniture is polished and protected, not just dusted. We leave beds perfectly made with neat, clean lines and no wrinkles, using a technique that transforms the look and feel of the room.
Step 7: The Final Floors and Finishing Touches Once every surface above the floor is pristine, our attention turns to the ground. This is the final step in the sequence to ensure nothing re-contaminates the clean floors. We first complete a thorough, edge-to-edge vacuuming, using crevice tools to extract dust and hair from the junction where the carpet meets the skirting board a critical detail. For hard floors, we then perform a two-stage mop: first with a lightly dampened, well-wrung microfiber pad and a pH-neutral floor cleaner to lift grime, and a second pass with a dry pad to absorb any residual moisture, preventing streaks and water damage. We take care of the baseboards as well, wiping them down to remove the thin film of dust that always settles there.
Step 8: The Final Walkthrough – Your Peace of Mind Before we leave, a team leader conducts a final, detailed walkthrough of the entire property against our comprehensive checklist. We don't just look; we inspect every corner, every switch, every polished surface. This is not a rushed job. We invite you to walk through with us. Your satisfaction is our only measure of success. Only after you are completely happy do we consider the job done. We gather our equipment, remove all waste and consumables, and leave you and your family alone in your transformed space.
Step-by-step guide to mopping the floor with Aoife Byrne
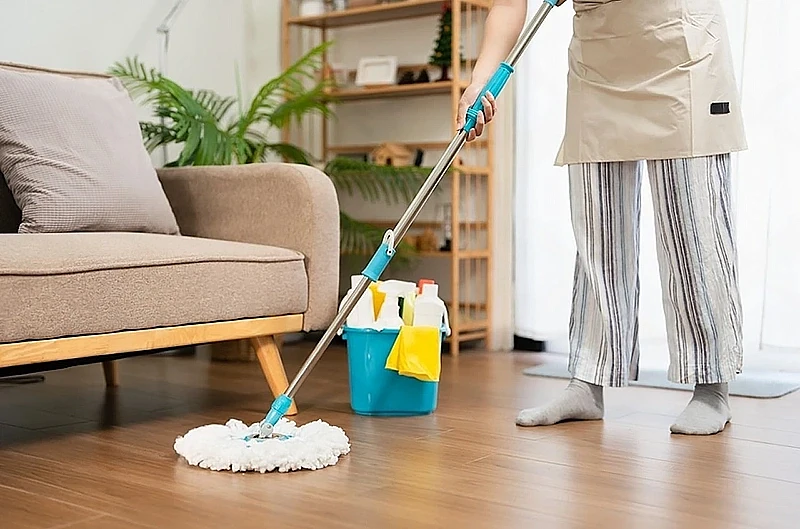
Aoife Byrne is ainm dom, and I’m a floor care specialist with Magical Cleaning. I have been working as a deep-clean specialist at Magical Cleaning for over five years. I’ve cleaned everything from centuries-old flagstone in Kilkenny cottages to modern luxury vinyl in Waterford apartments. Let me walk you through how we get floors truly spotless.
Preparation comes first. I clear the area of small furniture, bins, and rugs. Then I give the floor a meticulous dry vacuum using a HEPA machine with a crevice tool along all edges and corners. This is non-negotiable - if you skip dry dust removal, wet mopping just turns dirt into muddy soup.
Products must match the surface. For wood, I use a pH-neutral, water-based cleaner that feeds the seal without stripping it. For tile and stone, a slightly alkaline degreaser. I never use generic all-purpose sprays; they leave a dulling film. My essential kit includes a professional flat mop, a dual-bucket wringer system, and clean microfiber pads dedicated to that room only.
The wash itself happens in two passes. First, a damp never soaking microfiber pad with the right cleaning solution. I mop in a figure-eight pattern to lift soil without pushing it into grout lines. Second, I switch to a fresh pad with plain warm water to rinse away any remaining residue. This second step is what separates a professional finish from a sticky, dirt-attracting DIY job.
Drying is part of the clean, not an afterthought. I go over the floor with a dry microfiber pad immediately after rinsing, and if possible, I open windows to speed up evaporation. Wood floors especially hate sitting moisture.
For tricky spots - under low sofas, behind pedestals, deep corners - I don’t guess and hope. I use a slim, swivel-head flat mop that glides under furniture without moving it, and for corners, a detailing cloth wrapped around a spatula gets right into the angle where the floor meets the skirting board.
My quality check is simple and honest. I crouch down and view the floor against the light from the windows. Any missed streak or film is instantly visible. Finally, I wipe a clean white cloth across the surface - if it picks up anything, I repeat the rinse pass. That’s my guarantee: a floor that’s not just visually clean, but truly residue-free and safe for your family.
Reclaim Your Time and Your Home. Focus on what really matters or on relaxing.
The value of having your home professionally cleaned is not something you can boil down to shiny taps or mirrors without a streak in sight. It shows up in the less obvious places: that quieter feeling when you come in after a long day, the cleaner air your family ends up breathing, and the simple fact that you get your time back. Those weekend hours that used to disappear into an exhausting, not-quite-working DIY clean can go elsewhere-maybe a spin along the Waterford Greenway, a relaxed family lunch in a café in Kilkenny, or just putting your feet up in a living room that feels fresh and uncluttered.
Magical Cleaning is not just a service; it’s meant to feel like a working relationship. We are local to Kilkenny, Portlaoise, Waterford, Carlow, and Tipperary, and we focus on bringing a real sense of ease through a clean home. With a structured, friendly, experienced approach, we take the pressure out of one of those chores that tends to hang over everything else. If you would rather leave the deep cleaning to us and keep your attention on the rest of your life, call today to arrange your first general clean and see what the Magical difference feels like. A cleaner, healthier home is ready when you are.
In this article, we have looked at just one type of cleaning service, but we offer a wide range of services so that everyone can find what they need. You can choose and book a service on our Magical Cleaning services page.